1回審査が通ったから大丈夫!と思ったら甘かった。
Ready to Upload Binary
差し当たり、iTunes Connect から、New Versionの作成。 その後、【Ready to Upload Binary】で進み、最後に【Save】
くるくるで処理が終わらない
仕方なくブラウザを再起動したら、登録されている。。。 iTunes Connect のサーバが重いのか自分のマシンがおかしいのか?
Application Loaderでアップロードできない?
という事で次に、アプリをZipアーカイブして、Application Loader でアップしようと思ったら、
作成したバージョンが出てこない
未登録の【Ready to Upload】アプリが出てきた。
色々調べたらオーガナイザでアップロードした方が便利そうなので、そちらを使う事にした。
オーガナイザでアップロード
Xcode のビルド > Build And Archives を選択。
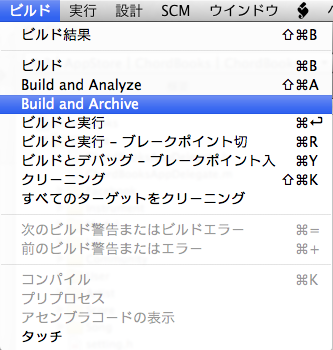
文字通り、ビルドとアーカイブを一緒にやってくれて、オーガナイザが開く。
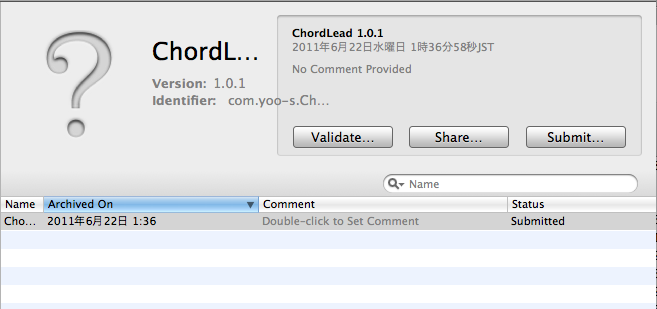 【Validate...】してみると、Bundle Identifier が違う!ってエラー。
(未登録のアプリの方を見に行ってる?)
えーーー、なんでーーー???
という事で、最終的にやった事。
最終的にやった事
(1) Mac再起動 (2) iTunes Connect の未登録のアプリ(ゴミ)を削除 (3) プロジェクトの build のコンテンツを全てゴミ箱にして Build And Archives
これでうまくいきました。 もしかしたら、(3) だけで良かったかも知れないが、心キレイさっぱりするため (2) もやりました。
Service で Timer を動かしてみました。 常駐アプリが作成できるAndroidの“サービス”とはを参考に作りました。
public class TimerService extends Service {

    class TimerServiceBinder extends Binder {
        TimerService getService() {
            return TimerService.this;
        }
    }

    public static final String ACTION = "TimerService";
    private Timer timer;

    @Override
    public void onCreate() {
        super.onCreate();
    }

    @Override
    public void onStart(Intent intent, int startId) {
        super.onStart(intent, startId);
    }

    @Override
    public void onDestroy() {
        super.onDestroy();
        if (timer != null) {
            timer.cancel();
            timer = null;
        }
    }

    @Override
    public IBinder onBind(Intent intent) {
        return new TimerServiceBinder();
    }

    @Override
    public void onRebind(Intent intent) {
    }

    @Override
    public boolean onUnbind(Intent intent) {
        return true;
    }

    public void schedule() {
        if (timer != null) {
            timer.cancel();
        }
        timer = new Timer();
        TimerTask timerTask = new TimerTask() {
            public void run() {
                sendBroadcast(new Intent(ACTION));
            }
        };

        //int delay = 1000 * 60 * 60 * 24;
        //int delay = 1000 * 60;
        int delay = 1000;
        Date now = new Date();
        now.setSeconds(0);
        timer.scheduleAtFixedRate(timerTask, now, delay);
    }

}
public class TimerActivity extends Activity {
    protected Intent intentAlerm;
    protected TextView timerLabel;
    protected TextView dateLabel;
    private TimerService timerService;
    private final TimerReceiver timerReceiver = new TimerReceiver()

    private class TimerReceiver extends BroadcastReceiver {
        @Override
        public void onReceive(Context context, Intent intent) {
            Date now = new Date();
            int nowHour = now.getHours();
            int nowMinute = now.getMinutes();
            int nowSecond = now.getSeconds();

            updateTimer(now);
    }

    private ServiceConnection serviceConnection = new ServiceConnection() {
        public void onServiceConnected(ComponentName className, IBinder service) {
            timerService = ((TimerService.TimerServiceBinder)service).getService();
            timerService.schedule();
        }

        public void onServiceDisconnected(ComponentName className) {
            timerService = null;
        }
    };

        @Override
        public void onCreate(Bundle savedInstanceState) {
                requestWindowFeature(Window.FEATURE_NO_TITLE);

                setContentView(R.layout.main);

        timerLabel = (TextView) findViewById(R.id.timerLabel);
        dateLabel = (TextView) findViewById(R.id.dateLabel);

                intentAlerm = new Intent(getApplicationContext(), TimerActivity.class);
                intentAlerm.setFlags(Intent.FLAG_ACTIVITY_RESET_TASK_IF_NEEDED);
                intentAlerm.setFlags(Intent.FLAG_ACTIVITY_NEW_TASK);

        Intent intent = new Intent(this, TimerService.class);
        startService(intent);

        IntentFilter filter = new IntentFilter(TimerService.ACTION);
        registerReceiver(receiver, filter);

        bindService(intent, serviceConnection, Context.BIND_AUTO_CREATE);

        unbindService(serviceConnection);
        bindService(intent, serviceConnection, Context.BIND_AUTO_CREATE);
        }

    @Override
    protected void onResume() {
        super.onResume();
    }

    @Override
    public void onDestroy() {
        super.onDestroy();
        if  (serviceConnection != null) {
            unbindService(serviceConnection);
            unregisterReceiver(receiver);
            wrestlingTimer.stopSelf();
        }
        Toast toast = Toast.makeText(this, "解除しました。", Toast.LENGTH_LONG);
        toast.setGravity(Gravity.CENTER, 0, 0);
        toast.show();
    }

    public void updateTimer(Date date) {
        SimpleDateFormat dateFormat = new SimpleDateFormat("yyyy/MM/dd (E)");
        SimpleDateFormat timeFormat = new SimpleDateFormat("HH:mm:ss");
        dateLabel.setText(dateFormat.format(date));
        timerLabel.setText(timeFormat.format(date));
    }

}
常駐アプリが作成できるAndroidの“サービス”とはのサンプルだと、タイマーをセットする度にmoveTaskToBack(true) してメインのActivity が見えなくなります。
上記のサンプルは、serviceConnection が作成された時に一気にタイマーを登録しました。
Gallery の View をクリックしたり、選択された時のイベントは、GalleryインスタンスにOnItemClickListener、OnItemSelectedListenerを登録してやるだけです。
サンプル
Gallery の Adapter は 別途 ImageAdapter として作ったがここでは省略。
    protected void loadGallery() {
        Gallery gallery = (Gallery) findViewById(R.id.gallery);
        gallery.setAdapter(new ImageAdapter(this, R.layout.image));

        gallery.setOnItemClickListener(new OnItemClickListener() {
            public void onItemClick(AdapterView parent, View v, int position, long id) {
                //GalleryのViewをクリックした時の処理
            }
        });
        gallery.setAnimationDuration(1000);
        gallery.setOnItemSelectedListener(new OnItemSelectedListener() {
                public void onItemSelected(AdapterView parent, View view, int position, long id) {
                    //選択された時の処理
                }

                public void onNothingSelected(AdapterView arg0) {

                }
        });
    }
Titanium 1.7 が登場し、待望の Titanium Studio がリリースされました。 Titanium StudioとTitanium Mobile 1.7をリリースしました Studio になってIDE環境になり、インストールや設定も楽になりました。 ※事前にXcode、Android SDKはインストール済み エディションはとりあえず Free でいいかと思います。
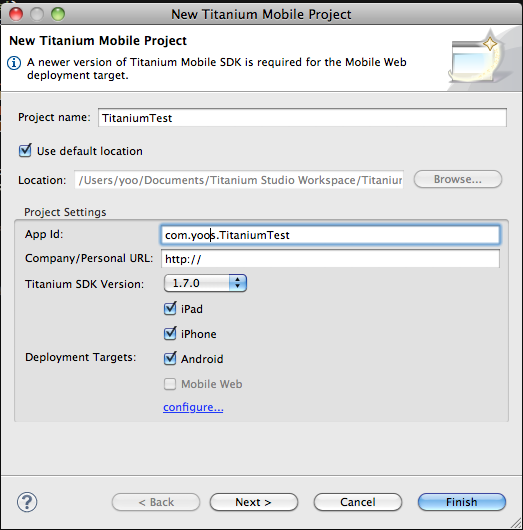
サンプルプロジェクト作成
早速プロジェクト作ってみる。
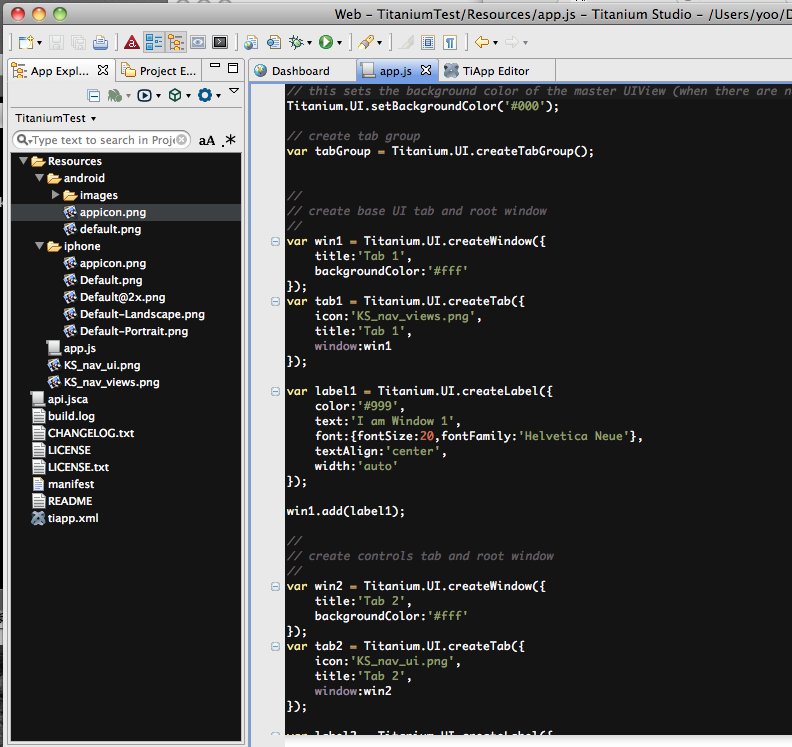 エディタはこんな感じ。
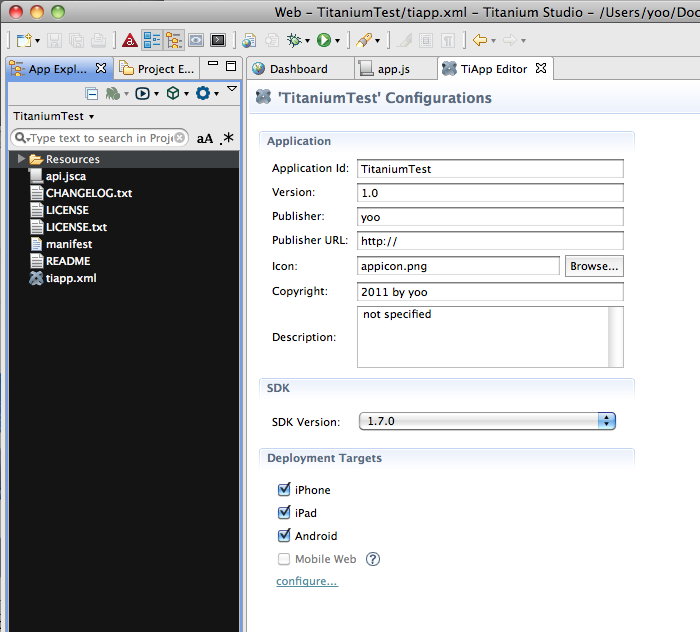
iPhone Sumilator でいきなり、ビルド&ランに失敗しました。
[ERROR] Error: Traceback (most recent call last): File "/Library/Application Support/Titanium/mobilesdk/osx/1.7.0/iphone/builder.py", line 1139, in main execute_xcode("iphonesimulator%s" % link_version,["GCC_PREPROCESSOR_DEFINITIONS=__LOG__ID__=%s DEPLOYTYPE=development TI_DEVELOPMENT=1 DEBUG=1 TI_VERSION=%s %s" % (log_id,sdk_version,debugstr)],False) File "/Library/Application Support/Titanium/mobilesdk/osx/1.7.0/iphone/builder.py", line 1057, in execute_xcode output = run.run(args,False,False,o) File "/Library/Application Support/Titanium/mobilesdk/osx/1.7.0/iphone/run.py", line 39, in run sys.exit(rc) SystemExit: 1
何度かプロジェクトを作り直してもだめ。
appcelerator のフォーラム見たら、 What is this error? うーん、やっぱりプロジェクト削除や、ビルド再構築すればよいの?
と言ういか、App ID の入力でパッケージ指定(com.yoos.XXXX)してなかった事に気づく。
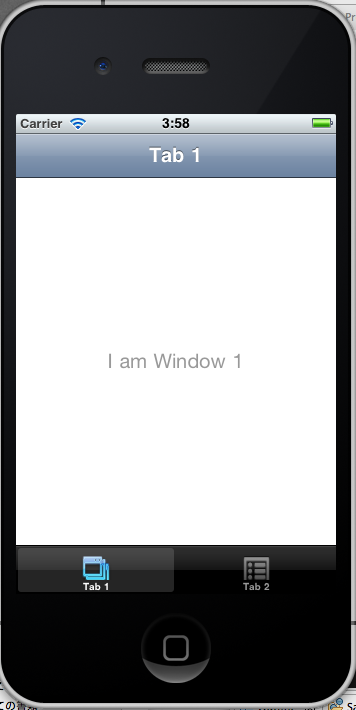
起動しました(結局、App IDが問題だったんだろうか?)
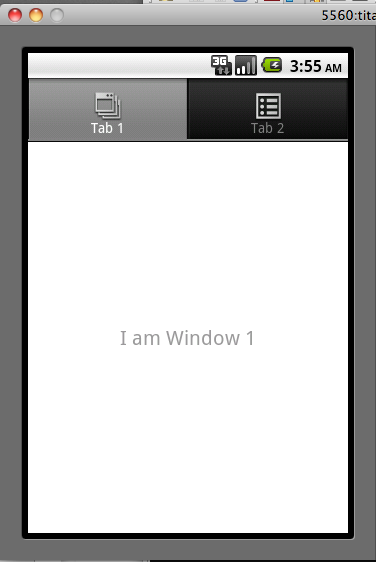
Android も起動しました。
さて、次の問題は Titanium の API やご作法を覚えなきゃいけない。
Titanium Mobile リファレンス
これは結構わかりやすい。 API Console と言いつつも、かなり放置しているが。。。
API の結果をブラウザで確認できる。
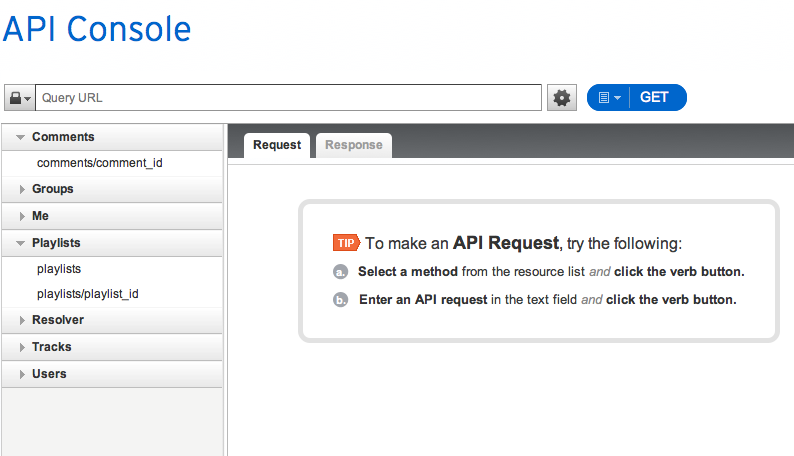 jsonで値が返ってくる。
Facebook とも連動するみたいだ。
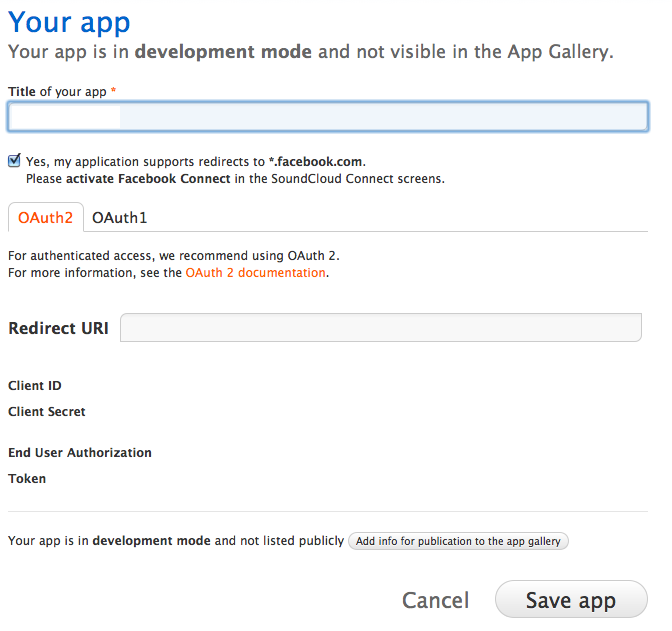 将来的に使う予定もあるので、とりあえずメモっておこう。
AppStoreに出品してるのにハマった。。。
Distributionのビルドできない
Android のアプリ公開がどんだけ楽か思い知った1日でした(苦)
Application failed codesign verification
キャプチャーとる余裕もなかったですが、コード署名認証の失敗です。 Application Loader でアップして気づきました。
Application failed codesign verification. The signature was invalid, or it was not signed with an Apple submission certificate. (-19011)
AppStore用のビルド構成作って、クリーンしてビルドしたのにダメです。 あと、以下のエラーも時折。
Code Sign error: The default keychain doesn't have an identity matching the profile 'アプリ名' and identity 'iPhone Developer'
まず、色んなとこ参考にした。 ・アプリ申請エラーの解決法「Application failed codesign verification. 」 ・はまりポイント解説付き iphone adhoc ビルドの方法 ・iPhoneアプリ申請時にハマったところ
個人的まとめ
Provisioning Portal のDistribution用証明書が有効か?
これはまず基本中の基本。
Distribution用証明書がなければ、実機テストの証明書同様にキーチェンアクセスで証明書をリクエスト。
自分も証明書は有効になってたので、本来は問題無いはずだった。

キーチェンアクセスの証明書、秘密鍵が有効か?
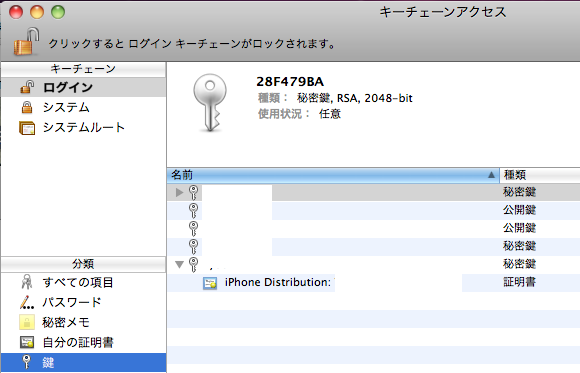 Distribution用の証明書を作成した秘密鍵が本当に有効になっているか?
気づいたら証明書がゴチャゴチャになっていた。
証明書の期限が切れかかってたのを理由に、この際整理して作り直しました(Revoke)。
ここでさらにハマったのが、
証明書や鍵がキーチェンから削除できない!
そんなときは、Macを再起動しましょう。いや本当に、再起動したら削除できました。
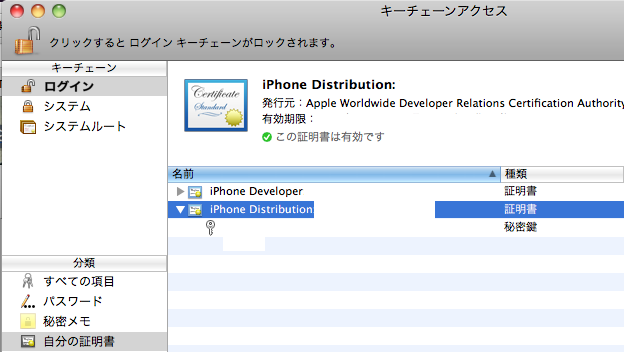 何かのアクセス権減の関係でしょうか?
Distribution用の Provisioning Profiles が有効か?
有効な証明書の状態で、Distribution用の Provisioning Profilesを作成しないといけない(と思う)。
 尚、 Provisioning Profiles が作成でいるってことは App ID があるという事なのでここは割愛。
自分は新しく証明書を作成したので、Provisioning Profiles の再作成した。
次は Provisioning Profiles のインストールと設定だ。
Distribution用のインストール
.mobileprovision ファイルをダウンロードしたらダブルクリックでインストールされる。
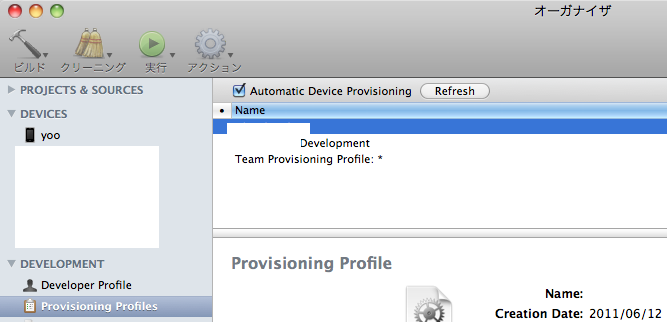 確認はオーガナイザと実際のパスを見ればいい。
/Library/MobileDevice/Provisioning Profiles/
Developer用の Provisioning Profiles とは違って、自分の実機にもインストールできなくなっている。 申請者本人なら、実機インストールできると思っていたが。。。 よって、基本はビルドできたかどうかだけ判断すれば良い。
Xcode の Distribution用Provisioning Profiles 設定
恐らく、ここが一番ハマってしまうところかも知れない。 理屈をしらない自分は、手当たり次第だったが少しずつ理解してきた。
まず、Debug、Release、申請用のビルド構成を3つ設定する。
デフォルトは、Debug、Release、だから申請用ビルドは、Releaseを複製する。
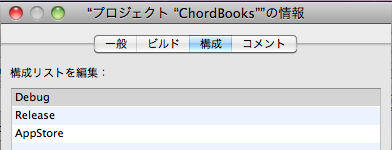 このやり方は、あくまでも通例。
ポイントは、 Distribution用Provisioning Profiles や Bundle identifier が申請用に設定されて、
キレイにビルドすれば終わりという簡単な話です。簡単な。。。
Provisioning Profiles はターゲットでも設定できる
プロジェクトのビルド設定を何度も何度も見直して設定し、クリーンビルド、クリーンビルド。
そして「Application failed codesign verification」です。
そんな時は、グループとファイル > ターゲットをダブルクリックして確認。
これ、プロジェクト > プロジェクト設定を編集 と一見同じ画面ぽいけど、実は違ったりする。
普通はターゲットのビルドはいじらないはずだけど、結果的にターゲットからCode署名を設定したらうまくいった。


Bundle identifier は重要
プロジェクト名と App ID が一致できなかったのが災い
ドメインに合わせようと、プロジェクト名はそのままでアプリ名を変えようと。。。 はい、失敗です。
プロジェクト名と 申請する Bundle identifier 一致させた方が混乱しない
ユーザに見えるアプリ名は、info.plist > Bundle display name で設定できるので未練を持たない事w プロジェクト名と Bundle identifier を一致させないと、システム側でエラーになるかと思われます。 なら、プロジェクト名を変えよう!と思いましたが、DB絡みの設定があって断念しました。
以上、とりあえずざっとなぶり書き。
ちなみに、iTunes Connect や Application Loader とかはスムーズにいきました(英語文章以外・・・)
セカイカメラのツイートでNFC-Contact-Exchanger ってのがあるそうです。
mixiの中の人が世界初NFCでプロポーズしたって話は有名ですが、これからNFCプログラミングがどんどん浸透しそうですね。 taglet
Saasesの回線がかなりいらつくので、さくらVPSにしました(何気に3契約目・・・)
今512Mプランだけど、以外と速い。 8月くらいには1Gプランにするつもりです。
このダサいサイトを直さねば。。。
iOS5の新フレームワーク Accounts を英語勉強がたら翻訳してみた。 誤訳、誤字だらけですが。。。
ざっと見た感じだけど、Androidのandroid.provider.Contactsと似たような仕様な気配。 iCloud でユーザがアカウントを利用する事が増えると予想されるので、将来的には重要な部分かも知れない。
ACAccount.h
/System/Library/Frameworks/Accounts.framework
ACAccount.accountDescription
人が閲覧可能のアカウントの説明
@property(nonatomic, copy) NSString *accountDescription
アプリケーションがこのアカウントにアクセスできるユーザ権限ダッタ場合、このプロパティは有効で、それ以外はnil です。
ACAccount.accountType
アカウントタイプ
@property(nonatomic, retain) ACAccountType *accountType
このプロパティは必須です。アカウントタイプを initWithAccountTypeメソッド を利用して指定します。 特殊なアカウント全てを取得するaccountsWithAccountType メソッドで利用する事ができます。
ACAccount.credential
credentialは、ユーザアカウント認証に利用されます。
@property(nonatomic, retain) ACAccountCredential *credential
このプロパティは必須で、アカウントを保存する前に設定が必要です。 プライパシーの理由で、このプロパティはアカウント保存後はアクセスする事はできません。
ACAccount.identifier
アカウント用のユニークな identifierです(読み込みのみ)
@property(nonatomic, readonly) NSString *identifier
アカウント取得するには、identifierを指定したaccountWithIdentifier メソッドで利用して下さい。
ACAccount.username
アカウント用のユーザ名です。
@property(nonatomic, copy) NSString *username
このプロパティは、アカウント保存前に設定する必要があります。 アカウント保存後は、アカウントに接続可能なユーザ権限を与えられたアプリケーションでこのプロパティが利用可能です。それ以外はnil になります。
initWithAccountType:
指定された方で新しいアカウントを初期化します。
- (id)initWithAccountType:(ACAccountType *)type
■パラメータ type アカウントのタイプです。 ■返り値 新しい初期化されたアカウント
ACAccountCredential.h
/System/Library/Frameworks/Accounts.framework
initWithOAuthToken:tokenSecret:
-[ACAccountCredential initWithOAuthToken:tokenSecret:]
■パラメータ token クライアントアプリケーションのtoken secret クライアントアプリケーションのsecret token ■返り値 新しい初期化された ACAccountCredential
ACAccountStore.h
-[ACAccountStore accountTypeWithAccountTypeIdentifier:]
指定されたアカウントタイプのidentifier に一致したアカウントタイプを返す。
- (ACAccountType *)accountTypeWithAccountTypeIdentifier:(NSString *)typeIdentifier
■パラメータ typeIdentifier アカウントタイプのidentifier ■返り値 typeindentifier に一致したアカウントタイプ
-[ACAccountStore accountWithIdentifier:]
指定したidentifier でアカウントを返す。
- (ACAccount *)accountWithIdentifier:(NSString *)identifier
■パラメータ identifier アカウント用のユニークな identifier ■返り値 identifierに一致したアカウント
ACAccountStore.accounts
アカウントストアによる、管理されたアカウント一覧(読み込みのみ)
@property(nonatomic, readonly) NSArray *accounts
-[ACAccountStore accountsWithAccountType:]
指定された型の全てのアカウントを返す。
- (NSArray *)accountsWithAccountType:(ACAccountType *)accountType
■パラメータ accountType アカウントの種類
-[ACAccountStore requestAccessToAccountsWithType:withCompletionHandler:]
指定した方のアカウントにアクセスします。
- (void)requestAccessToAccountsWithType:(ACAccountType *)accountType
 withCompletionHandler:(void (^)(BOOL granted, NSError *error))handler
■パラメータ accountType アカウントタイプ handler アクセスが許可、拒否された時に呼ばれるハンドラーです。 このハンドラは任意のキューで呼ばれます。ハンドラのパラメータは granted アクセスが許可されたかどうかBoolean型の値です。 アクセス許可された時はYES、それ以外はNOまたはエラーです。 error エラーが発生したときに返します。 Discussion このメソッドは、アプリケーションがアカウントにアクセスするか?ユーザ確認ダイアログ表示します。 許可された場合は、アプリケーションは保護されたプロパティへアクセスし、指定された型の全てのアカウントで動作します。
-[ACAccountStore saveAccount:withCompletionHandler:]
アカウントデータベースに保存します。
- (void)saveAccount:(ACAccount *)account withCompletionHandler:(ACAccountStoreCompletionHandler)completionHandler
アカウントをアカウントデータベースに保存する。
■パラメータ account 保存するアカウント completionHandler 処理が終了した時に呼ばれるハンドラーです。ハンドラーは任意のキューで呼ばれます。 アカウントタイプが認証をサポートして認証されなかった場合は、そのアカウントはcredentialsを利用して認証されます。 認証が成功した場合はアカウントが保存され、それ以外は保存されません。
ACAccountStoreChangedNotification
データベース上で変更されたアカウントストアで、アカウント管理されている時にポストします。 関連するuserInfo dictionary はありません。 この通知は、アカウントがローカルや外部で保存、削除された場合に呼ばれます。この通知を受け取った時は、全てのアカウントオブジェクトをリフレッシュすると良いでしょう。
ACAccountStoreCompletionHandler
アカウントデータベースの処理が完了した時に、呼ばれる指定のハンドラーです。
typedef void(^ACAccountStoreCompletionHandler)(BOOL success, NSError *error);
完了ハンドラーのパラメータは
success 処理が成功したかどうかのBoolean値です。処理が成功した場合はYES、それ以外はNOを返します。 error エラー発生時に返ります。
ACAccountType.h
ACAccountType.accessGranted
アプリケーションがアカウントにアクセスするのをユーザが許可したか?のBoolean値(読み込みのみ)
@property(nonatomic, readonly) BOOL accessGranted
アプリケーションがアクセスできる場合はYES、そうでない場合はNO
ACAccountType.accountTypeDescription
人がアカウントタイプの閲覧可能な説明(読み込みのみ)
@property(nonatomic, readonly) NSString *accountTypeDescription
ACAccountType.identifier
アカウントタイプのためのユニークなidentifier(読み込みのみ)
@property(nonatomic, readonly) NSString *identifier
"アカウントタイプ identifiers"の中の、記載された可能な値
ACAccountTypeIdentifierTwitter
サポートされたアカウントタイプによる Identifiers
NSString * const ACAccountTypeIdentifierTwitter;
■定数 ACAccountTypeIdentifierTwitter Twitterアカウントタイプのための Identifier
ACError.h
ACErrorAccountAuthenticationFailed
credential失敗の認証で、アカウントが保存されなかった
ACErrorAccountMissingRequiredProperty
必須プロパティが見つからず、アカウントが保存されなかった
ACErrorAccountNotFound
アカウントが見つからず、アカウントが削除されなかった An account was not deleted because it could not be found.
ACErrorAccountTypeInvalid
アカウントタイプが間違っており、アカウントが保存されなかった
ACErrorCode
typedef enum ACErrorCode {
   ACErrorUnknown = 1,
   ACErrorAccountMissingRequiredProperty,
   ACErrorAccountAuthenticationFailed,
   ACErrorAccountTypeInvalid,
   ACErrorAccountNotFound,
   ACErrorPermissionDenied
} ACErrorCode;
ACErrorDomain
記載無し(そのまま、ドメインが取得できない、、、だと思うが・・・)
ACErrorPermissionDenied
アプリケーションが処理を実行するパーミッションがなく、処理に失敗した
ACErrorUnknown
予期せぬエラー
AccountsDefines.h
#def ACCOUNTS_CLASS_AVAILABLE
記載無し
#def ACCOUNTS_EXTERN
記載無し
ここのページを参考に、Debian で iptables を設定。
この設定は手作業なので間違えると最悪の場合、サーバにアクセスでくなくなるので慎重に行う。 (さくらVPSなどのサーバはコントロールパネルのコンソールで復帰できますが・・・)
下準備
まずは送信全般と、icmp、loの受信を許可し、FORWARDは捨てます。
# iptables -P INPUT ACCEPT # iptables -P FORWARD DROP # iptables -P OUTPUT ACCEPT # iptables -F # iptables -A INPUT -p icmp -j ACCEPT # iptables -A INPUT -i lo -j ACCEPT
ここで状況確認。
# iptables -L Chain INPUT (policy ACCEPT) target prot opt source destination ACCEPT icmp -- anywhere anywhere ACCEPT all -- anywhere anywhere Chain FORWARD (policy DROP) target prot opt source destination Chain OUTPUT (policy ACCEPT) target prot opt source destination
次に必要な受信ポートを許可。 例)ssh、http、https、smtpの標準ポート
# iptables -A INPUT -p tcp --dport 22 -j ACCEPT # iptables -A INPUT -p tcp --dport 80 -j ACCEPT # iptables -A INPUT -p tcp --dport 443 -j ACCEPT # iptables -A INPUT -p tcp --dport 25 -j ACCEPT
一度確定したポートは許可して、残りは捨てる。
# iptables -A INPUT -m state --state ESTABLISHED,RELATED -j ACCEPT # iptables -P INPUT DROP
一番最後の一発がドキドキです。
で、この状態では再起動すると消えてしまうので起動時に有効にする必要あり。 Debian だと/etc/init.d/iptables がいつからかなくなったらしいので自分で作成します。
iptablesスクリプト
下記のスクリプトを利用しなくても、手入力で打ったコマンドをシェルスクリプト化して 起動してやっても良いのですが、先のページを参考に使ってみた。
iptables コマンドの引数によって処理をわけて、具体的にはiptables-restore、iptables-save 、 /etc/iptables.save の3ファイルを使って設定を入れ替えてる感じです。
#!/bin/bash start(){ iptables -F iptables-restore < /etc/iptables.save return 0 } stop(){ iptables-save > /etc/iptables.save return 0 } case "$1" in start) start ;; stop) stop ;; save) stop ;; restore) start ;; restart) stop start ;; esac
あとは実行権限を与えて
# chmod 755 /etc/init.d/iptables
ランレベルを指定して自動起動を設定。
# update-rc.d iptables defaults 18 Adding system startup for /etc/init.d/iptables ... /etc/rc0.d/K18iptables -> ../init.d/iptables /etc/rc1.d/K18iptables -> ../init.d/iptables /etc/rc6.d/K18iptables -> ../init.d/iptables /etc/rc2.d/S18iptables -> ../init.d/iptables /etc/rc3.d/S18iptables -> ../init.d/iptables /etc/rc4.d/S18iptables -> ../init.d/iptables /etc/rc5.d/S18iptables -> ../init.d/iptables
最後にスクリプトでiptables 設定保存。
# /etc/init.d/iptables save
設定結果
# iptables -L Chain INPUT (policy DROP) target prot opt source destination ACCEPT icmp -- anywhere anywhere ACCEPT all -- anywhere anywhere ACCEPT all -- anywhere anywhere ACCEPT tcp -- anywhere anywhere tcp dpt:www ACCEPT tcp -- anywhere anywhere tcp dpt:https ACCEPT tcp -- anywhere anywhere tcp dpt:smtp ACCEPT tcp -- anywhere anywhere tcp dpt:ssh ACCEPT all -- anywhere anywhere state RELATED,ESTABLISHED Chain FORWARD (policy DROP) target prot opt source destination Chain OUTPUT (policy ACCEPT) target prot opt source destination


