3D回転いわゆる Flip アニメーションを CoreAnimation で実装しようと思い調べてみた。
サンプル
- (void)animationTransform:(UIView *)view :(float)duration :(float)delay {
    CABasicAnimation* animation;
    animation = [CABasicAnimation animationWithKeyPath:@"transform"];
    animation.duration = duration;
    //animation.beginTime = delay;
    //animation.autoreverses = YES;
    animation.repeatCount = 0;

    CATransform3D   transform;
    transform = CATransform3DIdentity;
    animation.fromValue = [NSValue valueWithCATransform3D:transform];

    transform = CATransform3DMakeRotation(M_PI, 0, 1.0f, 0);
    animation.toValue = [NSValue valueWithCATransform3D:transform];
    animation.timingFunction = [CAMediaTimingFunction functionWithName:kCAMediaTimingFunctionEaseIn];

    [view.layer addAnimation:animation forKey:@"transformAnimation"];
}
アニメーション基本
プロパティベースのアニメーション のドキュメントを参考にしました。
(1) CABasicAnimation animationWithKeyPath: でアニメーションを作成 単純なアニメーションは CABasicAnimation 、複数実行させたい場合は CAAnimation を利用するようです。 引数は String型のプロパティで、CALayer Class Reference によると種類は以下のものがあるようです
frame property bounds property position property zPosition property anchorPointZ property anchorPoint property contentsScale property affineTransform setAffineTransform: transform property sublayerTransform property
(2) fromValue で始点 (3) 変換関数などでアニメーション座標を作成
CATransform3DMakeTranslation '(tx, ty, tz)'の平行移動を行う変換を返します CATransform3DTranslate 't'を'(tx, ty, tz)'だけ平行移動して、その結果を返します CATransform3DMakeScale `(sx, sy, sz)'の拡大縮小を行う変換を返します CATransform3DScale 't'を'(sx, sy, sz)'だけ拡大縮小し、その結果を返します CATransform3DMakeRotation ベクトル'(x, y, z)'を中心にしてラジアン'angle'分の回転をする変換を返します。ベクトルの長さがゼロの場合は同一変換が返されます。 CATransform3DRotate ベクトル'(x, y, z)'を中心にして't'をラジアン'angle'だけ回転し、その結果を返します
(4) toValue で作成したアニメーション座標で終点を設定 (5) duration で長さ指定 (6) layer addAnimation: でアニメーション追加
3D回転について
(1) transform で CABasicAnimation を作成し、CATransform3DIdentity で 3D座標を fromValue に設定 (2) CATransform3DMakeRotation() で 回転座標を作成し、toValue に設定 ※第1引数は回転(π で半回転)、第2,3,4 引数は中心点 (x, y, z) になります
アニメーションのペーシング
アニメーションの easing のような時間調整は、CAMediaTimingFunction で設定します。 タイミング、時空間、CAAnimation のドキュメントを見てみると、あらかじめ定数で用意されています。
kCAMediaTimingFunctionLinear kCAMediaTimingFunctionEaseIn kCAMediaTimingFunctionEaseOut kCAMediaTimingFunctionEaseInEaseOut
カスタムで指定する事もでき、ベジェ曲線の原理で設定するみたいです。
CAMediaTimingFunction *customTimingFunction;
customTimingFunction=[CAMediaTimingFunction functionWithControlPoints:0.25f :0.1f :0.25f :1.0f];

画面固定の設定を、よく忘れてしまうのでメモ。 Manifest.xml で android:screenOrientation を指定する。
縦固定:android:screenOrientation="portrait" 横固定:android:screenOrientation="landscape"
Activity レベルで画面固定
ZipFile と ZipEntry ~Androidでzipを解凍する を参考に ZIP ファイルを解凍してみる。
サンプルコード
ボタンをクリックして、SDカード/パッケージ名/sample.zip ファイルを SDカード/パッケージ名/sample/ に解凍。 ※sample.zip は sample ディレクトリを含むZIP [java] public void onCreate(Bundle savedInstanceState) { super.onCreate(savedInstanceState); setContentView(R.layout.main);
    Button zipAcvhiveButton = (Button) findViewById(R.id.zipArchiveButton);
    zipAcvhiveButton.setOnClickListener(new OnClickListener()
    {
        public void onClick(View v)
        {
            String zipfileName = "sample.zip";
            String baseDir = Environment.getExternalStorageDirectory().getPath()
                    + "/" + v.getContext().getPackageName() + "/";
            String zipPath = baseDir + zipfileName;
            String sampleDir = baseDir + "sample";
            new File(sampleDir).mkdir();
            zipArchiveFiles(zipPath, baseDir);
        }
    });
}

public void zipArchiveFiles(String zipPath, String outputDir)
{
    err = 0;
    try {
        ZipFile zipFile = new ZipFile(zipPath);
        Enumeration<? extends ZipEntry> enumeration = zipFile.entries();
        while(enumeration.hasMoreElements())
        {
            ZipEntry zipEntry = enumeration.nextElement();
            String outputPath = outputDir + zipEntry.getName();
            zipArchiveFile(zipPath, zipEntry.getName(), outputPath);
        }
        zipFile.close();
    }
    catch(Exception ex)
    {
        err = -1;
        Log.d( "Err", "" + ex);
    }
}

public int err = 0;
public void zipArchiveFile(String zipPath, String file, String outFile)
{
    err = 0;
    try
    {
        ZipFile zipFile = new ZipFile(zipPath);
        ZipEntry entry = zipFile.getEntry(file);
        InputStream inputStream = zipFile.getInputStream(entry);
        OutputStream outputStream = new FileOutputStream(outFile);

        byte[] buffer = new byte[ 1024 * 4 ];

        int r = 0;
        while( -1 != ( r = inputStream.read(buffer)) )
        {
            outputStream.write( buffer, 0, r );
        }
        outputStream.close();
        inputStream.close();
        zipFile.close();
    }
    catch( Exception ex )
    {
        err = -1;
        Log.d( "Err", "" + ex);
    }
}
[/java] Android の Zip書き出しは、ちょっと手続きが多いみたいです。
Environment.getExternalStorageDirectory().getPath() で SDカードのパスが取得できる。 zipFile.entries() でZip一覧(ZipEntry を継承したEnumeration)を取得し、ループで1ファイルずつ解凍する。 ちなみに、zipEntry.getName() でファイル名を取得するが、Zip にディレクトリを含む場合はディレクトリを含むパスになる。
sample/xxxx.txt
Zip からの書き出しは ZipFile() で各ファイルパスを指定し、zipFile.getInputStream() でInputStream オブジェクトを取得。
InputStream をループで回し、OutputStream で指定したパスにファイルを書き出す。 ※サンプルの場合、1024 x 4 バイトずつ処理
うーん、もうちょっと簡単にならないのかな? もしかしたら、他の方法もあるかも知れませんが。。。

久々に PHP ネタ。 GD で png 画像を透過、リサイズしてみる。
サンプル
    function resize_image($org_path, $new_path, $to_width, $to_height) {
        list($org_width , $org_height) = getimagesize($org_image_path);
        $src_image = imagecreatefrompng($org_path);

        $rate = 1;
        if ($org_width > $org_height) {
            $rate = $to_width / $org_width;
        } elseif ($org_width < $org_height) {
            $rate = $to_height / $org_height;
        } else {
            if ($to_width > $to_height) {
                $rate = $to_height / $org_height;
            } else {
                $rate = $to_width / $org_width;
            }
        }
        $to_width = $rate * $org_width;
        $to_height = $rate * $org_height;

        // 再サンプル
        $new_image = imagecreatetruecolor($to_width, $to_height);
        imagealphablending($new_image, false);
        imagesavealpha($new_image, true);

        imagecopyresampled($new_image, $src_image, 0, 0, 0, 0, $to_width, $to_height, $org_width, $org_height);

        imagepng($new_image, $new_image_path);

        imagedestroy($src_image);
        imagedestroy($new_image);
    }
png 透過の手順は、 (1) imagecreatetruecolor() で画像作成 (2) imagealphablending(), imagesavealpha() でアルファチャンネルの作成 (3) imagepng() で画像の書き出し
リサイズの手順は (1) getimagesize() で取得したサイズ配列から (2) 比率を計算(サンプルの計算はちょっとあやしいかも) (3) imagecopyresampled() でリサンプリング
Xcode4 になって右クリックで操作できる項目が大幅に変更されて戸惑う事が多々あるが、 「フレームワークの追加」もその1つです。
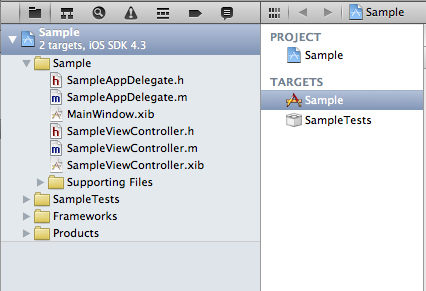
親切かどうか、プロジェクトの設定が「プロジェクトメニュー」からではなく、 「Project Navigator」で設定するようにりました。
フレームワークの追加方法
Project Navigator からプロジェクトを選択し、TARGES を選択する。
Build Phases を選択し、Link Binary With Libraries を開く。
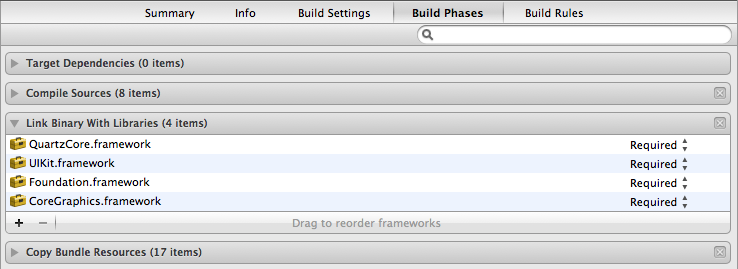
あとは、Xcode3 同様に framework を選択するだけ。
ln: /Users/yoo/Library/Application Support/SIMBL/Plugins/iPhone Simulator Capture.bundle: No such file or directory
HTML5 で作る iOS アプリ PhoneGap 前に勉強会の雑談で聞いた程度で実のところ知らないのだが、ちょっと調べてみる。
インストール
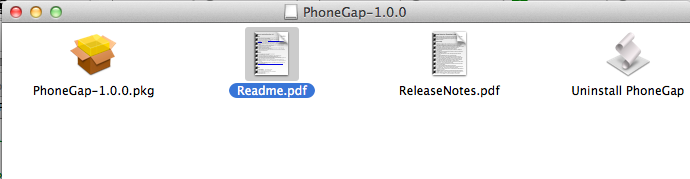
PhoneGap公式サイト 、もしくはGitからダウンロード。
自分は公式サイトからダウンロードしました。
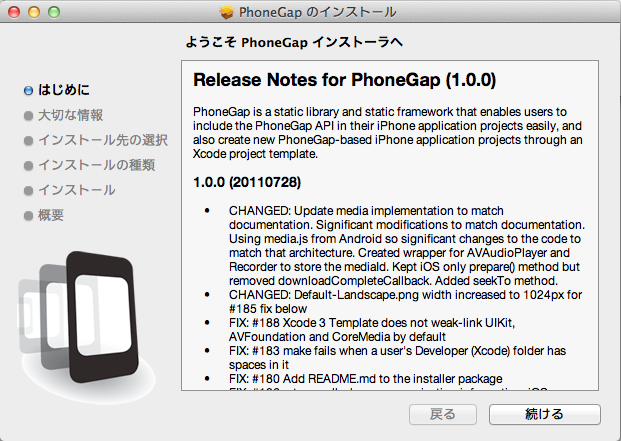
最新のMacBook Airに入れたので、Lion + Xcode4 の環境でインストール。
PhoneGap は Xcode4 に未対応みたいですが、www ディレクトリの選択処理をすればとりあえずは動くようです。
ちなみに、以下のライブラリがインストールされるようです。
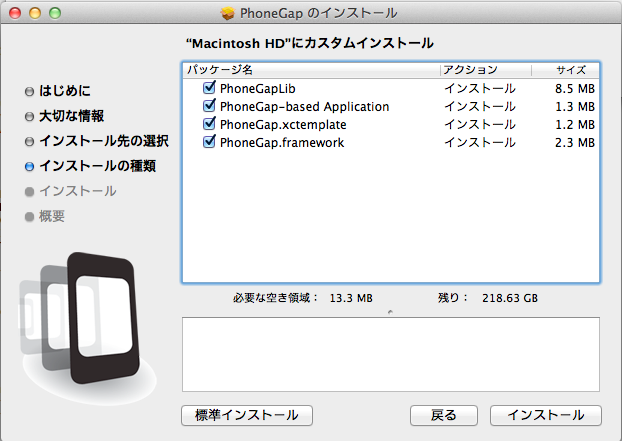
プロジェクト作成
PhoneGap をインストール後の Xcode プロジェクト作成画面に、「PhoneGap」を選択できるようになります。
プロジェクトを作成すると、必要な Framework や テンプレートファイルも作成されています。
PhoneGap.framkework の中身は以下の通り。
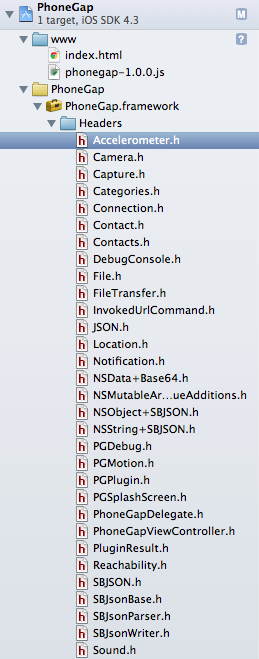 JSON のように普通のライブラリや、Camrea のようにラッパー関数が入ってるものがあります。
www ディレクトリの設定
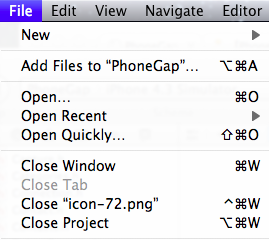
Xcode4 でインストールすると www ディレクトリがプロジェクト内に表示されないので、手動で選択する必要があります。
(1) File > Add File To "PhoneGap" を選択。
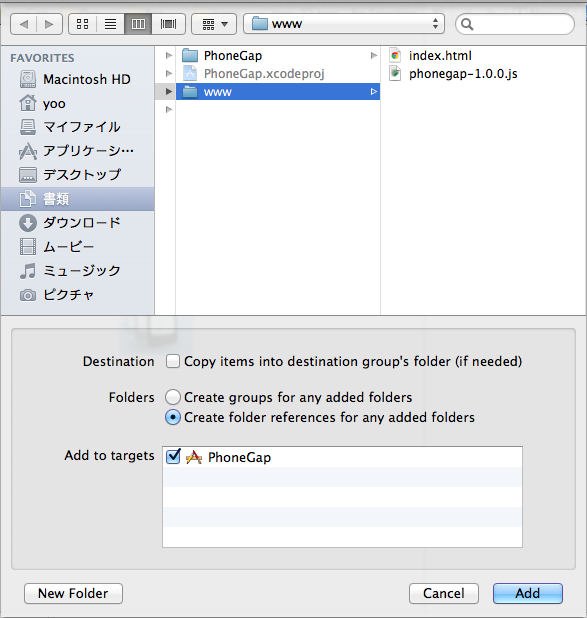
(2) www ディレクトリを選択は、 Copy items into ...のチェックを外し、Create Folder Reference をチェックして行う。
PhoneGap の概要
説明の順が逆になってしまいましたが、PhoneGap の最大の特徴は
HTML ベースであってビューは HTML + CSS 、コントロールは JavaScript(JQuery Mobile)
にあるでしょう。 iOS よりに言うと UIWebView ベースで iPhone アプリが動いている事になります。 また、JQuery から PhoneGap.freamework を通じて、Objective-C のネイティブコードにアクセスできるようです。 ※ネイティブコードの呼び出しの仕組みは「PhoneGap: NativeCodeの呼び出し」を参考
以上を踏まえると、Titanium Mobile よりも一層 Web系開発に近く開発難易度が低いかも知れません。
ただ裏を返せば WebView ベースなので JQuery Mobile と WebKit の仕様にほぼ依存してしまう事がデメリットでしょう。
つまりは動作が遅くなったり、UIWebView による不具合の可能性を秘めています
また、ネイティブコードとの連携もグレーゾーンかもしれません(やってみないとわからない)。
しかし PhoneGap はハマれば、作業分担や開発効率の面では最強かも知れません。 (ただ、設計がとても重要になるでしょう) 電子書籍アプリ系で PhoneGap を選択する理由が何となくわかった気がします。

Macbook Air 13 が届いたので色々とインストール中。 MacPorts でなく Homebrew をインストールすることにした。
Hombebrew のインストール
Ruby でインストールします。
/usr/bin/ruby -e "$(curl -fsSL https://raw.github.com/gist/323731)"
デフォルトだとruby のパスは通ってないので、設定した方がいいですね。 ※2012/04/21現在は以下のコマンドに変更(?)
ruby -e "$(/usr/bin/curl -fksSL https://raw.github.com/mxcl/homebrew/master/Library/Contributions/install_homebrew.rb)"
パッケージ
Homebrew ではパッケージのことを Formula と言うそうです。 Formula を検索するには
brew search FormulaName
インストールするには
brew install FormulaName
だが、インストールで以下のエラーがでる。
Error: Cannot write to /usr/local
/usr/local の書き込み権限がない(root)になってるので、sudo するか 権限を変更するか?ですよね。 とりあえず、権限を変更してみる。
sudo chown -R $USER /usr/local
これで Formula をインストールできるようになりました。
コマンド
ヘルプコマンドがあるので、これでだいたいわかるかと。
brew help Example usage: brew install FORMULA... brew uninstall FORMULA... brew search [foo] brew list [FORMULA...] brew update brew outdated brew [info | home] [FORMULA...] Troubleshooting: brew doctor brew install -vd FORMULA brew [--env | --config] Brewing: brew create [URL [--no-fetch]] brew edit [FORMULA...] open https://github.com/mxcl/homebrew/wiki/Formula-Cookbook Further help: man brew brew home
AppStoreでアプリがアップデート公開されたら、とんでもない自体になりました。
バージョンアップしたらアプリが起動しない!
と恐ろしい報告が。。。
今回のアップデートはSQLite に 12 カラム追加したので恐らく CoreData あたりかな?と思うのですが、migrate の仕方も問題ないですし開発でもアップデートできているので・・・原因が掴めません。
アプリのログを確認する
まず、アプリのログを見たい!ってことで、どうすればいいのかと言うと、
(1) iPhone のアプリを iTunes 同期させる。
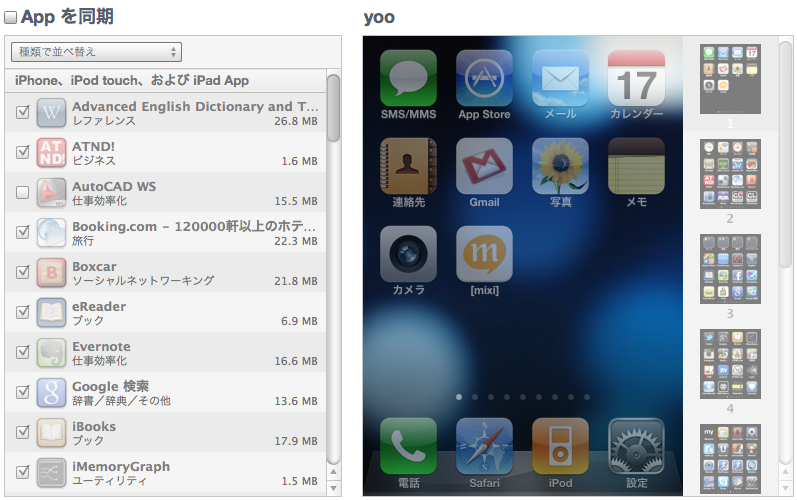 (2) 以下のディレクトリにクラッシュログが保存されている。
/Users/ユーザ/Library/Logs/App Store/CrashReporter
するとこんなログが
execution code が 0x8badf00d ("ate bad food")
これを元にググってみる。
CoreData のマイグレーションは時間がかかる
CoreData - マイグレーションを考慮した CoreDataManager パターン の記事で解決しました。 (まだAppStoreで公開されていないので、多分ですが・・・) CoreData に限らず
application:didFinishLaunchingWithOptions で制限時間を超えると起動しない
のです。 改めて前のバージョンの開発バージョンに戻して試した結果
データ200件超で、カラム12個追加で 30秒くらいでした
ということで、自分のアプリの対策をすることにしました。
マイグレーション判別の画面を追加
一番の肝は、didFinishLaunchingWithOptionsで マイグレーションの待機処理させない事です。 問題のアプリの構成は、
(1) UITabView で複数画面存在する (2) 最初の起動画面で CoreData にアクセスしての一覧表示 (3) 他の画面でも CoreData にアクセスする
シーケンス的には、
didFinishLaunchingWithOptions 起動 → UITabView 起動 → ViewController 起動 → マイグレーション判別と処理 ※非同期処理 → トップ画面表示
重要なのは、dispatch_async(GCD) のブロック文で非同期処理する事です。 でないと、didFinishLaunchingWithOptions で待機してしまい、また時間制限で終了してしまいます。
ということで、まずUITabView にマイグレーション処理する ViewController を追加。
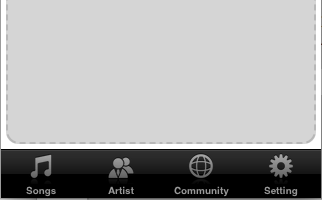
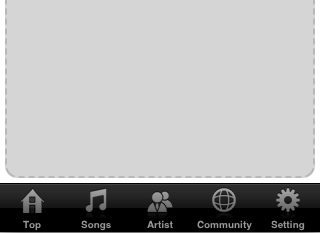
ユーザにあまり違和感を与えないように、Top画面としました。 この辺は作るアプリによって違いますので、それぞれ考える必要がありますね。
マイグレーションを判別する
CoreData - マイグレーションを考慮した CoreDataManager パターン の記事では、CoreDataManager を別途作ってやっていますが、それをすると今回は修正が大変なので AppDelegate 経由で処理させることに。 ただし、あくまでも AppDelegate に 一般的な CoreData の処理が実装されている話が前提です。
まずは、マイグレーションを判別するコード
- (BOOL)isRequiredMigration {
    NSURL *storeURL = [[self applicationDocumentsDirectory] URLByAppendingPathComponent:@"Sample.sqlite"];
    NSError* error = nil;

    NSDictionary* sourceMetaData = [NSPersistentStoreCoordinator metadataForPersistentStoreOfType:NSSQLiteStoreType
                                                               URL:storeURL
                                                             error:&error];
    if (sourceMetaData == nil) {
        return NO;
    } else if (error) {
        NSLog(@"Checking migration was failed (%@, %@)", error, [error userInfo]);
        abort();
    }

    BOOL isCompatible = [self.managedObjectModel isConfiguration:nil
                                        compatibleWithStoreMetadata:sourceMetaData];

    return !isCompatible;
}
isConfiguration:nil
マイグレーションの更新
マイグレーションの更新に関しては、従来通り persistentStoreCoordinator で処理すればいいけど、気分的に明示的に別途コードを追加。
- (NSPersistentStoreCoordinator *)doMigration {
    NSLog(@"--- doMigration ---");
    NSURL *storeURL = [[self applicationDocumentsDirectory] URLByAppendingPathComponent:@"Sample.sqlite"];

    NSDictionary *options = [NSDictionary dictionaryWithObjectsAndKeys:
                             [NSNumber numberWithBool:YES], NSMigratePersistentStoresAutomaticallyOption,
                             [NSNumber numberWithBool:YES], NSInferMappingModelAutomaticallyOption,
                             nil];
    NSError *error = nil;
    __persistentStoreCoordinator = [[NSPersistentStoreCoordinator alloc] initWithManagedObjectModel:[self managedObjectModel]];
    if (![__persistentStoreCoordinator addPersistentStoreWithType:NSSQLiteStoreType configuration:nil URL:storeURL options:options error:&error])
    {
        NSLog(@"Unresolved error %@, %@", error, [error userInfo]);
        abort();
    }

    return __persistentStoreCoordinator;
}
マイグレション更新という意味では、NSPersistentStoreCoordinator を返す必要はないので void か BOOL でよいかも。
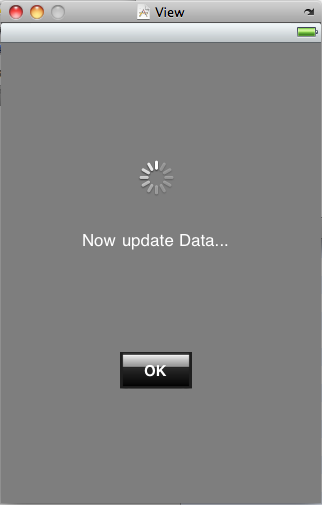
マイグレーション実行画面を作る
UITabView で最初に起動される TopViewController とマイグレーション実行画面 MigrateViewController も作成。
 TopViewController の ViewDidLoad にマイグレーション更新時に TopViewController を起動させる処理を記述。
- (void)viewDidLoad {
    [super viewDidLoad];
    SampleAppDelegate *appDelegate = [[UIApplication sharedApplication] delegate];

    if ([appDelegate isRequiredMigration]) {
        [self showMigrateView];
    }
}

- (void)showMigrateView {
    SampleAppDelegate *appDelegate = [[UIApplication sharedApplication] delegate];
    MigrateViewController *controller = [[MigrateViewController alloc]
                                                    initWithNibName:@"MigrateViewController"
                                                    bundle:nil];

    controller.delegate = self;
    controller.view.alpha = 0.0f;
    [appDelegate.window addSubview:controller.view];

    [UIView animateWithDuration:0.5f
                          delay:0.0f
                        options:UIViewAnimationOptionAllowUserInteraction
                     animations:^{
                         [controller.view setFrame:CGRectMake(0, 0, 320, 480)];
                         [controller.view setAlpha:1.0f];
                     }
                     completion:^(BOOL finished){

                     }];

}
最後に、MigrateViewController が起動された時にマイグレーション更新処理をする。
- (void)doMigration {
        SampleAppDelegate *appDelegate = [[UIApplication sharedApplication] delegate];
    [appDelegate doMigration];
}

- (void)viewWillAppear:(BOOL)animated {
    dispatch_queue_t queue = dispatch_get_global_queue(DISPATCH_QUEUE_PRIORITY_DEFAULT, 0);

    self.message.text = NSLocalizedString(@"MIGRATION_MESSAGE_UPDATE", nil);
    self.okButton.hidden = YES;
    self.indicator.hidden = NO;

    dispatch_async(queue, ^{[self doMigration];
        dispatch_async(dispatch_get_main_queue(), ^{
            self.message.text = NSLocalizedString(@"MIGRATION_MESSAGE_RESULT", nil);
            self.indicator.hidden = YES;
            self.okButton.hidden = NO;
        });
    });

}
これで、CoreData のマイグレーションが発生した場合は、非同期で更新処理がされるはずです。 いやぁ、本当に盲点でした。過信はいけませんねぇ。
info.plist に UIPrerenderedIcon を追加しチェックするとアイコンの光沢が消えます。

XcodeのバージョンによってInfo.plistの設定UIが変わります。
4.6現在だと、TARGETS > Info で「Icon files」の階層内で設定してやります。
Icon already includes gloss effects
![]()